Let’s EncryptでWebサイトSSL化に挑戦したら簡単過ぎた(ConoHa, CentOS7)

昨今の時代の流れに乗ってサイトのSSL化をやってみた。以前別のサービスを使ってSSL化していたことがあったけど、そのためにはSSL化するドメインのメールサーバを立ててないといけなくて、メールのやりとりとかも必要で正直メンドくさかった(しかも英語で)。

↑の経験からSSL化っていろいろ面倒なんだろうなーとか思ってたけど、Let’s Encryptで挑戦してみたら一瞬にできてしまった。すごい。

必要なWebサーバ環境

メールサーバとかは立てなくて大丈夫。でも一応最低限必要な環境を用意しないといけないので念のため記載。

  • ドメイン名(DNS名)でアクセスできるサーバであること
  • http(80番ポート/tcp)、https(443番ポート/tcp)でアクセスできること

また、今回はApacheが動いている状態で実行。他のWebサーバ(Nginxとか)が動いている場合も同じコマンドでいけるみたい。
Webサーバが動いていないサーバでもオプション追加でOK。詳しくは参考サイトを参照。

インストール

# yum install epel-release
# yum install certbot

証明書取得

-wオプションはドキュメントルートディレクトリ、-dはドメイン(FQDN)

[root@www ~]# certbot certonly --webroot -w /var/www/html -d www.tetsis.com
Saving debug log to /var/log/letsencrypt/letsencrypt.log
Plugins selected: Authenticator webroot, Installer None
Enter email address (used for urgent renewal and security notices) (Enter 'c' to
cancel): (連絡がとれるメールアドレス)
Starting new HTTPS connection (1): acme-v01.api.letsencrypt.org

-------------------------------------------------------------------------------
Please read the Terms of Service at
https://letsencrypt.org/documents/LE-SA-v1.1.1-August-1-2016.pdf. You must agree
in order to register with the ACME server at
https://acme-v01.api.letsencrypt.org/directory
-------------------------------------------------------------------------------
(A)gree/(C)ancel: A

-------------------------------------------------------------------------------
Would you be willing to share your email address with the Electronic Frontier
Foundation, a founding partner of the Let's Encrypt project and the non-profit
organization that develops Certbot? We'd like to send you email about EFF and
our work to encrypt the web, protect its users and defend digital rights.
-------------------------------------------------------------------------------
(Y)es/(N)o: Y
Starting new HTTPS connection (1): supporters.eff.org
Obtaining a new certificate
Performing the following challenges:
http-01 challenge for www.tetsis.com
Using the webroot path /var/www/html for all unmatched domains.
Waiting for verification...
Cleaning up challenges

IMPORTANT NOTES:
- Congratulations! Your certificate and chain have been saved at:
/etc/letsencrypt/live/www.tetsis.com/fullchain.pem
Your key file has been saved at:
/etc/letsencrypt/live/www.tetsis.com/privkey.pem
Your cert will expire on 2018-01-27. To obtain a new or tweaked
version of this certificate in the future, simply run certbot
again. To non-interactively renew *all* of your certificates, run
"certbot renew"
- Your account credentials have been saved in your Certbot
configuration directory at /etc/letsencrypt. You should make a
secure backup of this folder now. This configuration directory will
also contain certificates and private keys obtained by Certbot so
making regular backups of this folder is ideal.
- If you like Certbot, please consider supporting our work by:

Donating to ISRG / Let's Encrypt:   https://letsencrypt.org/donate
Donating to EFF:                    https://eff.org/donate-le

Apacheに証明書を設定

# vim /etc/httpd/conf.d/ssl.conf

SSLCertificateFile /etc/letsencrypt/live/www.tetsis.com/fullchain.pem

SSLCertificateKeyFile /etc/letsencrypt/live/www.tetsis.com/privkey.pem

# systemctl restart httpd

これで完了。いい時代になりました。
参考

https://letsencrypt.jp/usage/

オレオレ認証局のクライアント証明書失効方法

前回の投稿の続き

発行したクライアント証明書を使えないようにさせたくなったときの方法

クライアント証明書の無効化

# cd /etc/pki/tetsis-client
# openssl ca -config openssl.cnf -gencrl -revoke tetsis.cert.pem

失効リストの更新

# cd /etc/pki/tetsisCA
# openssl ca -config openssl.cnf -gencrl -out crl.pem

失効リストの確認

# openssl crl -in crl.pem -text

参考

http://www.nina.jp/server/slackware/openssl/openssl-command.html#revoke

オレオレ認証局でクライアント証明書をつくる(CentOS7)

前回の投稿の続き

新規ディレクトリ作成

# cd /etc/pki
# mkdir tetsis-client
# cp tetsisCA/openssl.cnf tetsis-client/

openssl設定ファイル編集

/etc/pki/tetsis-client/openssl.cnf を編集

(以下を追加)
[ client_cert ]
basicConstraints=CA:FALSE
keyUsage = digitalSignature, keyEncipherment
extendedKeyUsage = clientAuth
subjectKeyIdentifier=hash
authorityKeyIdentifier=keyid,issuer

Apacheの設定

/etc/httpd/conf.d/ssl.conf を編集

# SSLCACertificateFileかSSLCARevocationFileの下あたりに以下を追加
<Directory />
SSLRequireSSL
SSLVerifyClient require
SSLUserName SSL_CLIENT_S_DN_CN
Satisfy Any
Allow from All
SSLRequire %{SSL_CLIENT_S_DN_CN} in {"tetsis"} # 認証ユーザ。複数のユーザを設定するにはカンマ区切りで書く。
</Directory>

Apacheの再起動

# systemctl restart httpd

クライアント証明書の作成

# cd /etc/pki/tetsis-client
# openssl req -config openssl.cnf -new -days 3650 -keyout tetsis.key.pem -out tetsis.req.pem -days 3650 -extensions client_cert
Generating a 2048 bit RSA private key

writing new private key to 'tetsis.key.pem'
Enter PEM pass phrase:  # 秘密鍵のパスフレーズ入力
Verifying - Enter PEM pass phrase:  # 秘密鍵のパスフレーズ入力

Country Name (2 letter code) [JP]:
State or Province Name (full name) [Tokyo]:
Locality Name (eg, city) [Shinagawa-ku]:
Organization Name (eg, company) [tetsis company]:
Organizational Unit Name (eg, section) []:
Common Name (eg, your name or your server's hostname) []:tetsis  # 認証するユーザ名
Email Address []:

Please enter the following 'extra' attributes
to be sent with your certificate request
A challenge password []:
An optional company name []:

秘密鍵のパスフレーズ削除

# openssl rsa -in tetsis.key.pem -out tetsis.key.pem
Enter pass phrase for tetsis.key.pem:
writing RSA key

CSRにCA秘密鍵で署名

# openssl ca -config openssl.cnf -days 3650 -policy policy_anything -out tetsis.cert.pem -extensions client_cert -infiles tetsis.req.pem
Using configuration from openssl.cnf
Enter pass phrase for /etc/pki/tetsisCA/private/cakey.pem:  # パスフレーズ入力
Check that the request matches the signature
Signature ok

Certificate is to be certified until Oct  8 08:37:09 2028 GMT (3650 days)
Sign the certificate? [y/n]:y

1 out of 1 certificate requests certified, commit? [y/n]y
Write out database with 1 new entries
Data Base Updated
  • 秘密鍵: tetsis.key.pem
  • CSR(署名リクエスト): tetsis.req.pem
  • クライアント証明書: tetsis.cert.pem

ブラウザにインポートするp12ファイル作成

# openssl pkcs12 -export -in tetsis.cert.pem -inkey tetsis.key.pem -certfile /etc/pki/tetsisCA/cacert.pem -out tetsis.p12
Enter Export Password:  # パスフレーズ入力(ユーザがアクセスする際に必要になる)
Verifying - Enter Export Password:  # パスフレーズ入力(ユーザがアクセスする際に必要になる)

ブラウザにクライアント証明書(tetsis.p12)をインポート

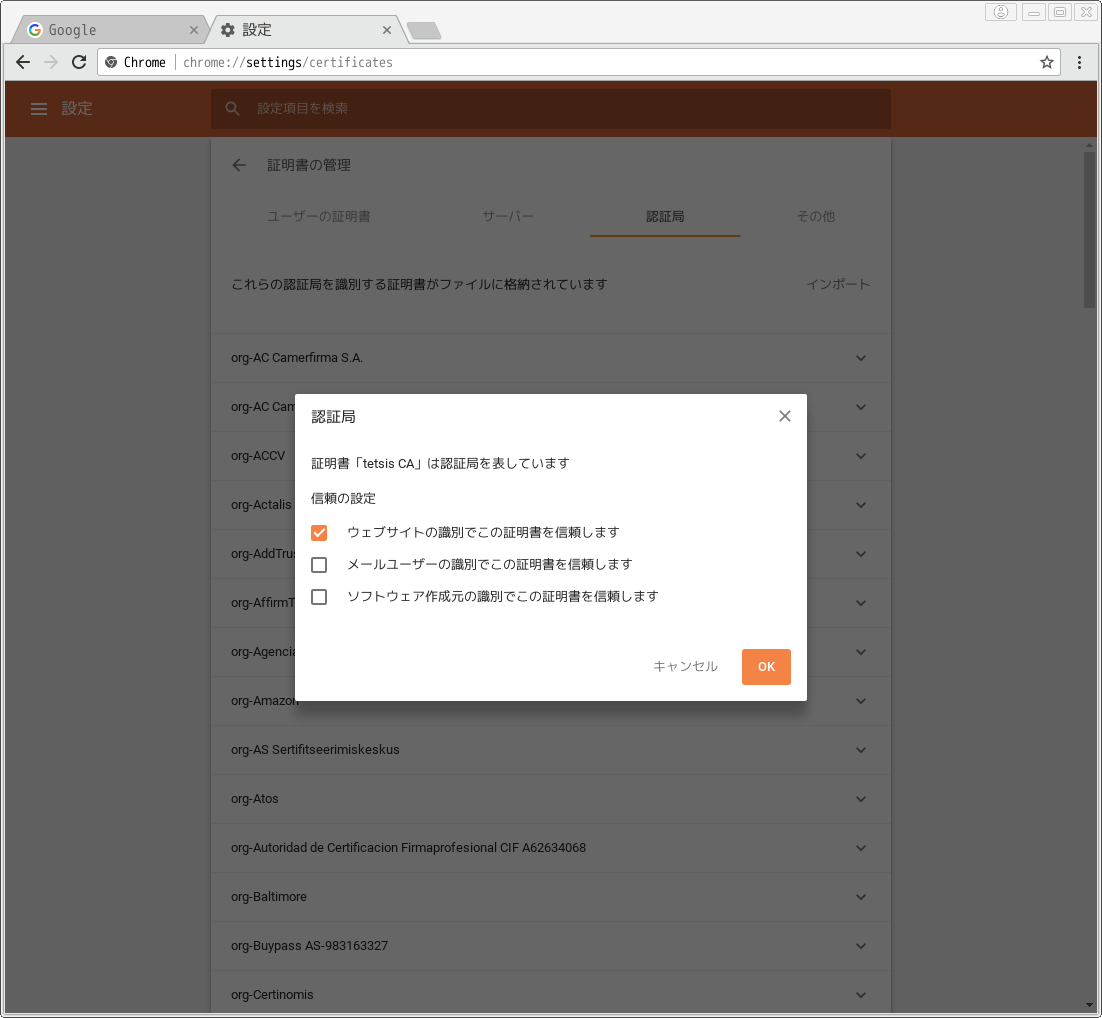
(20171027追記)クライアント証明書をインポートする場合は、CA証明書も自動的にインポートされる。この場合でも「信頼の設定」が必要なため、CA証明書の方もチェックを忘れないように。

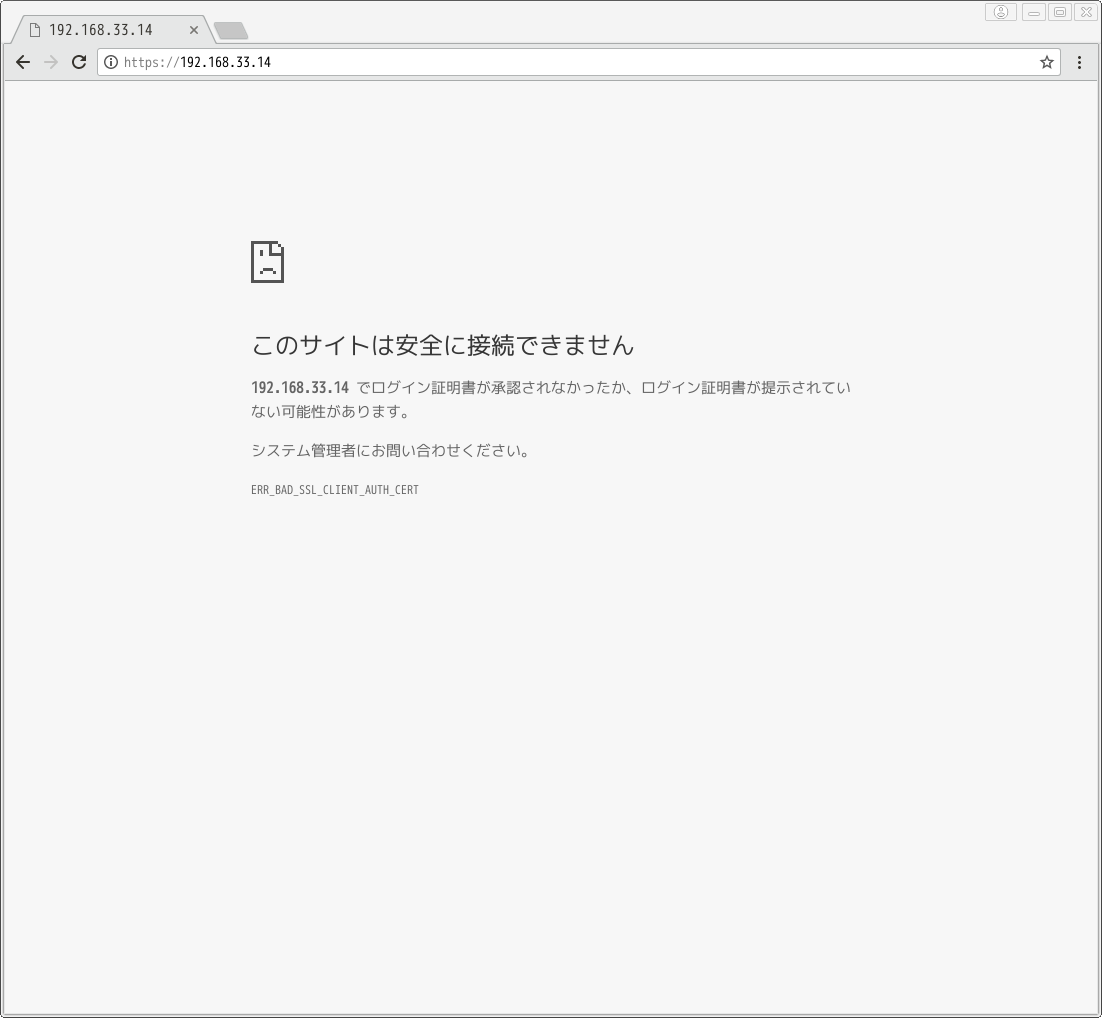
  • 現時点でページにアクセスするとエラーになる
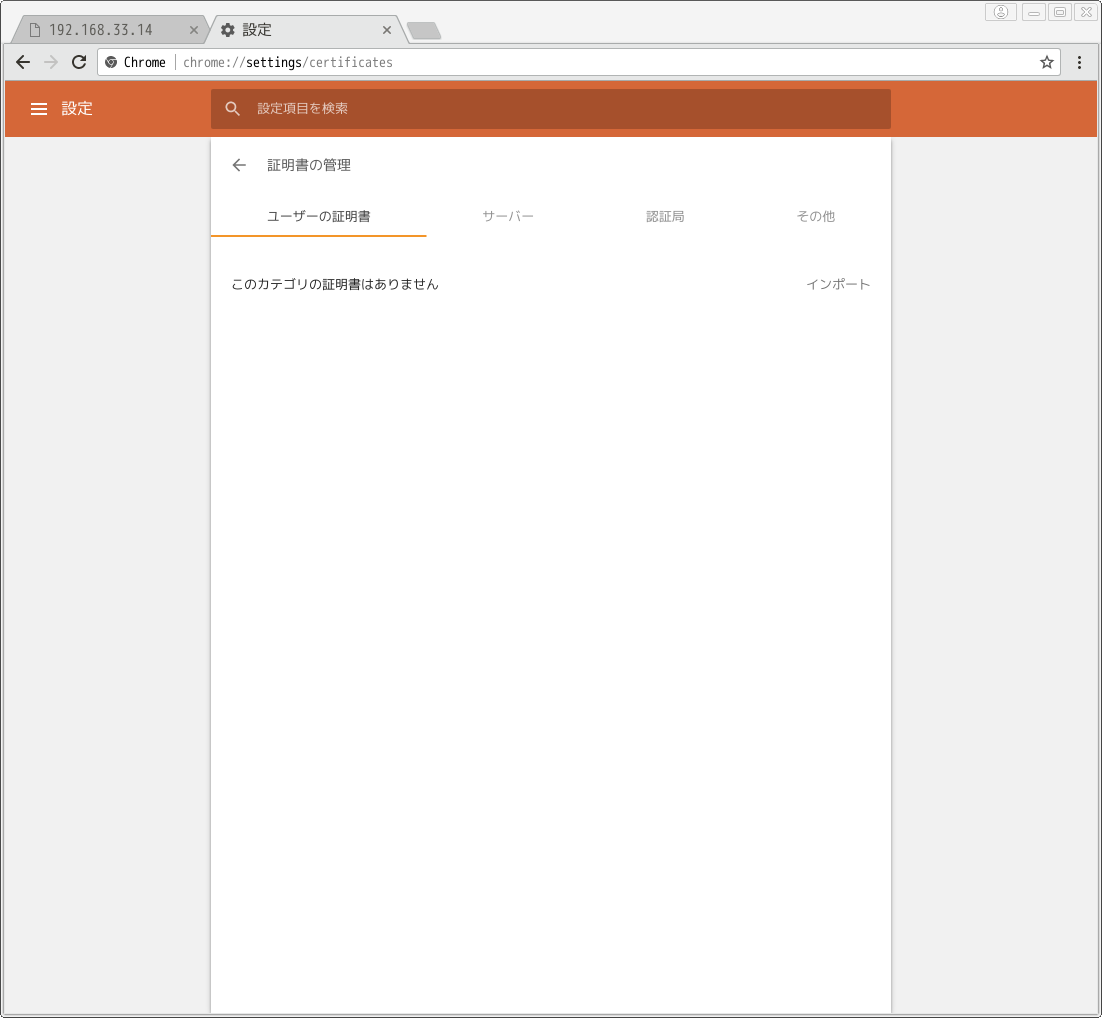
  • 「設定」→「証明書の管理」→「ユーザの証明書」タブを選択し、「インポート」をクリック
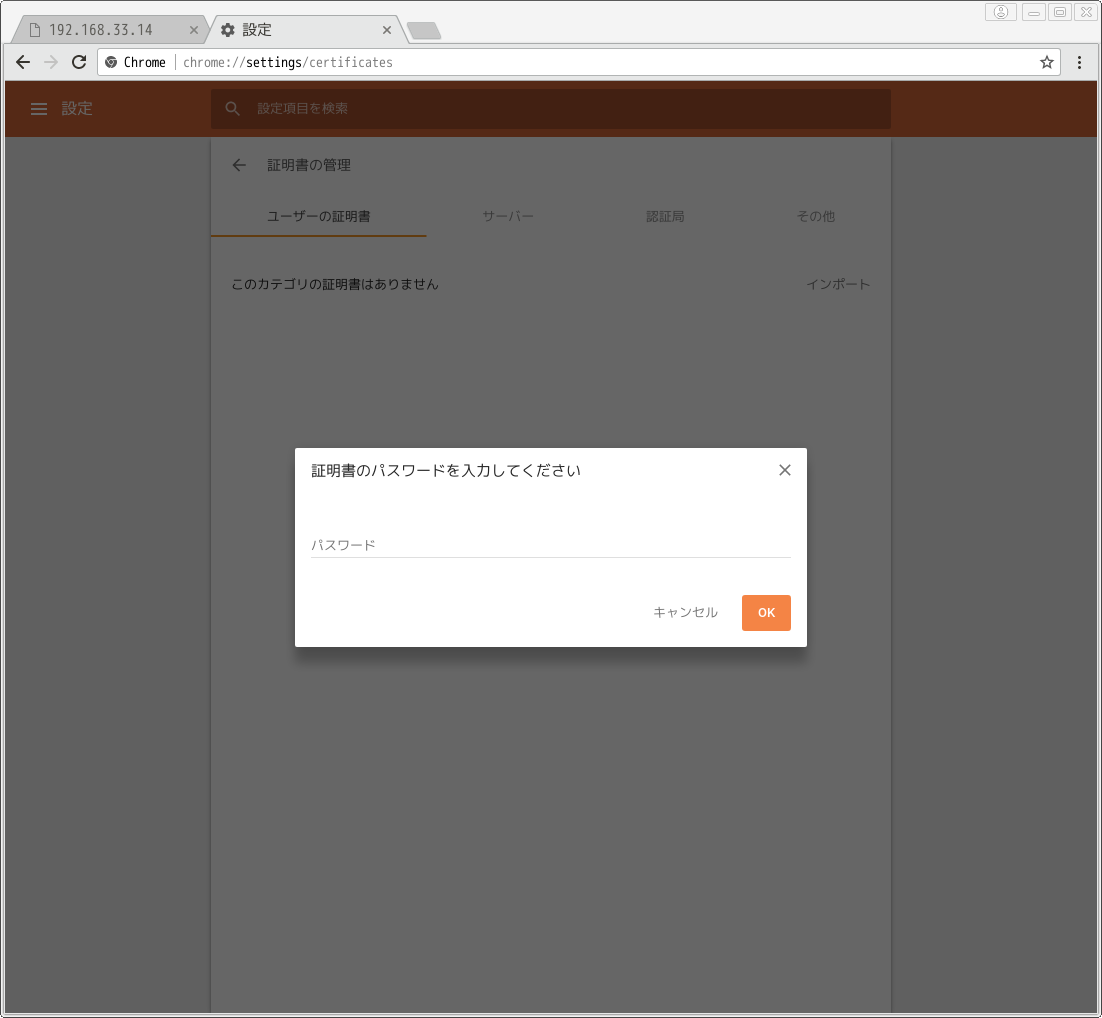
  • 作成したp12ファイルを選択し、パスワードを入力
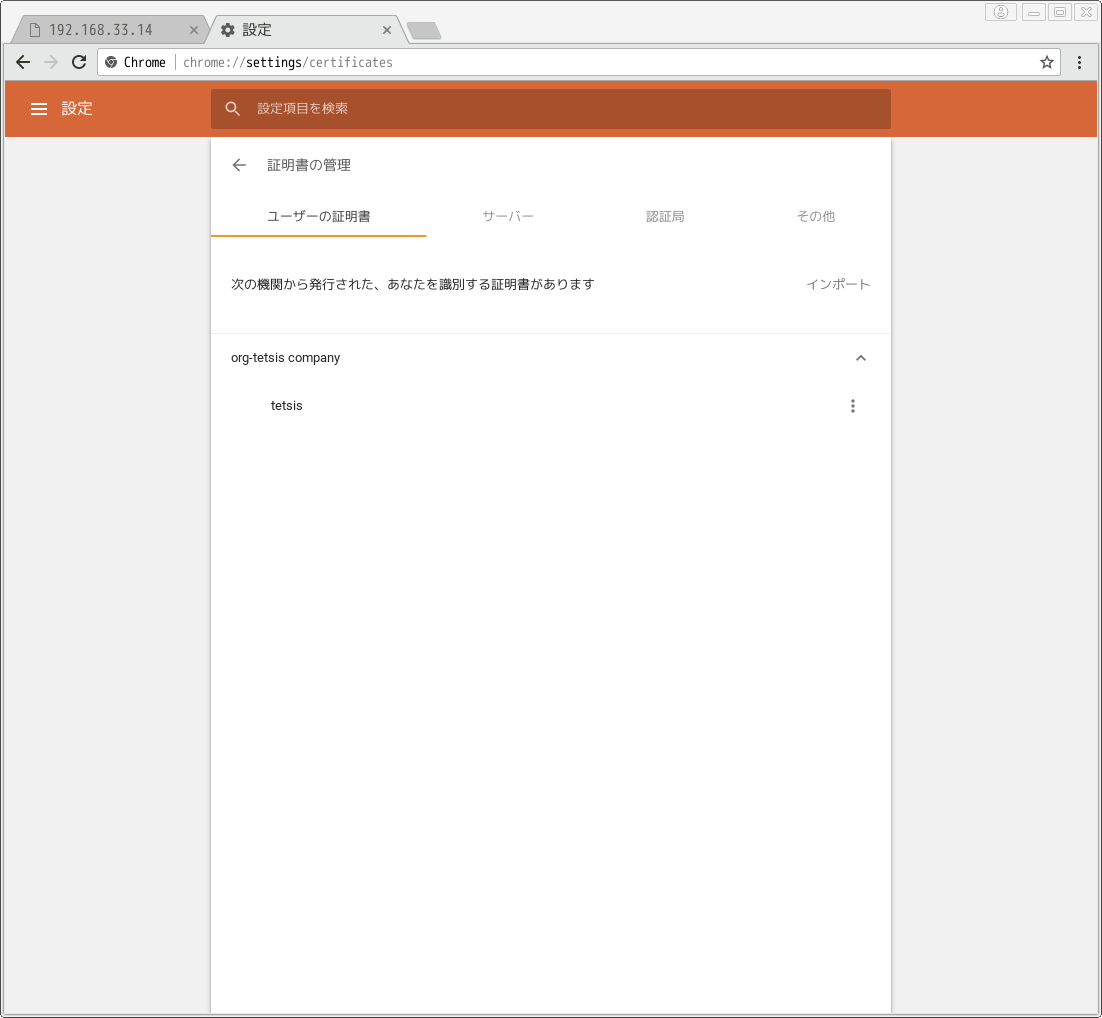
  • 追加したクライアント証明書が表示される
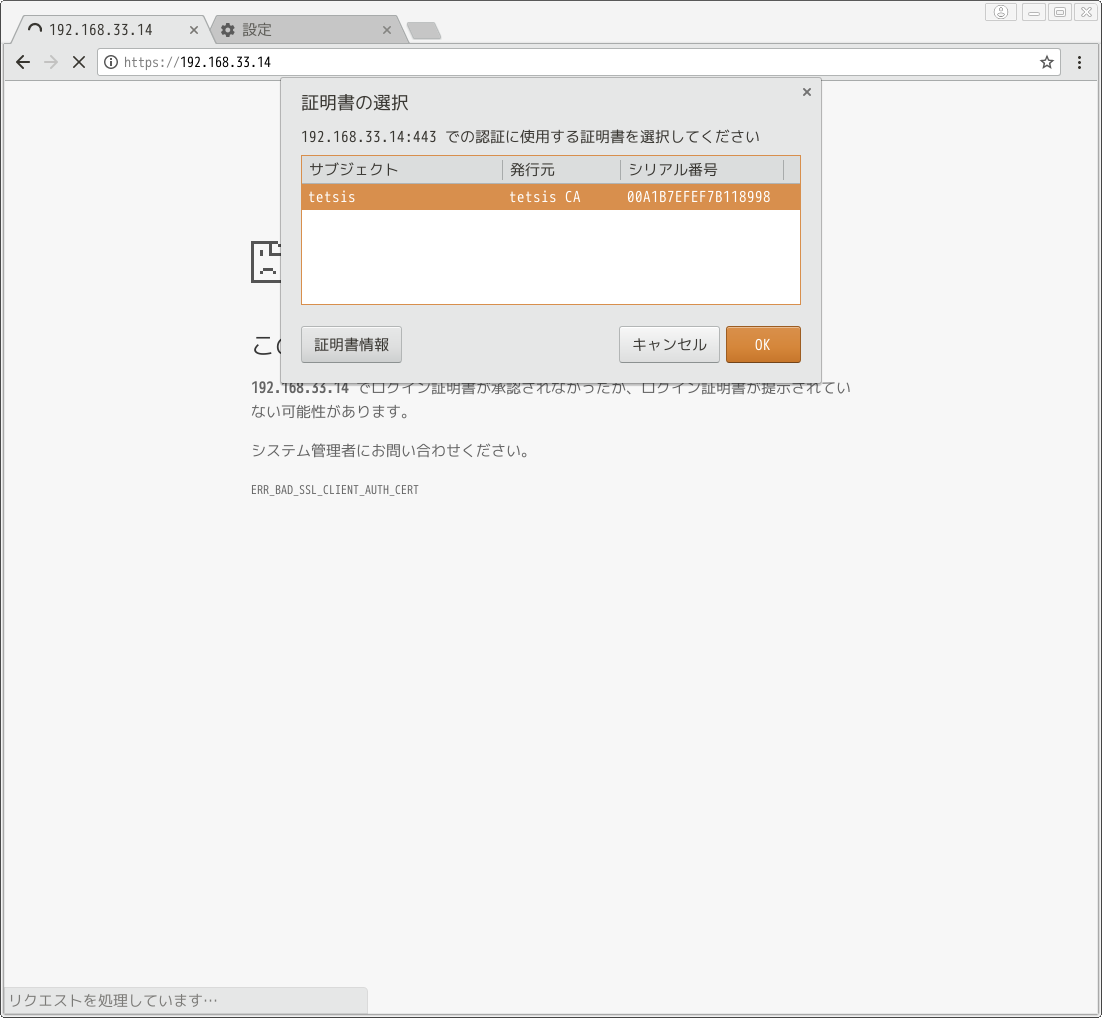
  • 再度ページにアクセスすると「証明書の選択」ウィンドウが表示されるため、「OK」をクリック
  • ページが表示される。成功

参考サイト

オレオレ認証局とサーバ証明書をつくる(CentOS7)

オレオレ認証局を作ってCA証明書をブラウザにインポートしておけば自作公開サーバをHTTPS化したときに楽にアクセスできる。

いつかは正式な証明書を発行してもらう予定だが、まずはオレオレで。

環境

  • CentOS 7.2
  • Apache 2.4.6
  • mod_ssl 2.4.6
  • openssl 1.0.2k-8

CA証明書作成

新規ディレクトリ作成とオリジナルファイルコピー

cd /etc/pki
mkdir tetsisCA
cp tls/misc/CA tetsisCA/
cp tls/openssl.cnf tetsisCA/
echo 01 > tetsisCA/crlnumber

設定ファイル編集

vim tetsisCA/CA
SSLEAY_CONFIG="-config /etc/pki/tetsisCA/openssl.cnf"  # 修正
if [ -z "$DAYS" ] ; then DAYS="-days 3650" ; fi # 10 year  # 修正
CADAYS="-days 3650" # 10 years  # 修正
REQ="$OPENSSL req $SSLEAY_CONFIG"
CA="$OPENSSL ca $SSLEAY_CONFIG"
VERIFY="$OPENSSL verify"
X509="$OPENSSL x509"
PKCS12="openssl pkcs12"
 
if [ -z "$CATOP" ] ; then CATOP=/etc/pki/tetsisCA ; fi  # 修正
vim tetsisCA/openssl.cnf
dir     = /etc/pki/tetsisCA     # Where everything is kept  # 修正
(中略)
[ req_distinguished_name ]
countryName         = Country Name (2 letter code)
countryName_default     = JP  # 修正
countryName_min         = 2
countryName_max         = 2
 
stateOrProvinceName     = State or Province Name (full name)
stateOrProvinceName_default = Tokyo  # 修正
 
localityName            = Locality Name (eg, city)
localityName_default        = Shinagawa-ku  # 修正
 
0.organizationName      = Organization Name (eg, company)
0.organizationName_default  = tetsis company  # 修正
(中略)
[ usr_cert ]
(中略)
# This is typical in keyUsage for a client certificate.
keyUsage = digitalSignature, keyEncipherment  # 修正
 
# This will be displayed in Netscape's comment listbox.
#nsComment          = "OpenSSL Generated Certificate"  # コメントアウト
(中略)
# This is required for TSA certificates.
extendedKeyUsage = serverAuth
(中略)
[ v3_ca ]
(中略)
# Key usage: this is typical for a CA certificate. However since it will
# prevent it being used as an test self-signed certificate it is best
# left out by default.
keyUsage = cRLSign, keyCertSign  # コメントアウト解除

CA証明書作成

# cd /etc/pki/tetsisCA
# ./CA -newca
CA certificate filename (or enter to create)  # エンター
 
Making CA certificate ...
Generating a 2048 bit RSA private key
........+++
...........................................+++
writing new private key to '/etc/pki/tetsisCA/private/./cakey.pem'
Enter PEM pass phrase:  # パスフレーズ入力
Verifying - Enter PEM pass phrase:  # パスフレーズ入力
 
Country Name (2 letter code) [JP]:
State or Province Name (full name) [Tokyo]:
Locality Name (eg, city) [Shinagawa-ku]:
Organization Name (eg, company) [tetsis company]:
Organizational Unit Name (eg, section) []:
Common Name (eg, your name or your server's hostname) []:tetsis CA
Email Address []:
 
Please enter the following 'extra' attributes
to be sent with your certificate request
A challenge password []:
An optional company name []:
Using configuration from /etc/pki/tetsisCA/openssl.cnf
Enter pass phrase for /etc/pki/tetsisCA/private/./cakey.pem:  # パスフレーズ入力
Check that the request matches the signature
Signature ok
(中略)
Write out database with 1 new entries
Data Base Updated
  • CA証明書: cacert.pem
  • CA秘密鍵: private/cakey.pem

証明書失効リスト作成

# openssl ca -config openssl.cnf -gencrl -out crl.pem
Using configuration from openssl.cnf
Enter pass phrase for /etc/pki/tetsisCA/private/cakey.pem: # パスフレーズ入力

サーバ証明書作成

Google CromeではIPアドレスでアクセスした場合SAN(Subject Alternative Name)を設定していないと”ERR_CERT_COMMON_NAME_INVALID”エラーが出てしまう。
(IPアドレスが原因かは不明。DNS名持っててもSAN設定しないといけないかも)

そのため、サーバ証明書にはSAN値を設定して作成する。
本当はもっとスマートな方法があるかもしれないが、とりあえずちゃんと動いたこの方法を書いておく。

新規ディレクトリ作成

cd /etc/pki
mkdir tetsis-server
cp tetsisCA/openssl.cnf tetsis-server/

設定ファイル編集

vim tetsis-server/openssl.cnf
req_extensions = v3_req # The extensions to add to a certificate request  # コメントアウト解除
(中略)
[ v3_req ]
 
subjectAltName = @alt_names
(中略)
# 末尾に追加
[alt_names]
IP.1 = 192.168.33.14  # サーバのアドレス

秘密鍵とCSR作成

# cd /etc/pki/tetsis-server
# openssl req -config openssl.cnf -new -days 3650 -keyout server.key -out server.csr
 
writing new private key to 'server.key'
Enter PEM pass phrase:  # 秘密鍵のパスフレーズ入力
Verifying - Enter PEM pass phrase:  # 秘密鍵のパスフレーズ入力
 
Country Name (2 letter code) [JP]:
State or Province Name (full name) [Tokyo]:
Locality Name (eg, city) [Shinagawa-ku]:
Organization Name (eg, company) [tetsis company]:
Organizational Unit Name (eg, section) []:
Common Name (eg, your name or your server's hostname) []:192.168.33.15
Email Address []:
 
Please enter the following 'extra' attributes
to be sent with your certificate request
A challenge password []:
An optional company name []:

秘密鍵のパスフレーズ削除

# openssl rsa -in server.key -out server.key
Enter pass phrase for server.key:  # 秘密鍵のパスフレーズ入力
writing RSA key

CA証明書で署名したサーバ証明書を作成

openssl ca -config openssl.cnf -days 3650 -extensions v3_req -extfile openssl.cnf -out server.crt -infiles server.csr
  • サーバ秘密鍵: server.key
  • サーバCSR: server.csr
  • サーバ証明書: server.crt

Apacheの設定

設定ファイルの編集

vim /etc/httpd/conf.d/ssl.conf
DocumentRoot "/var/www/html"  # コメントアウト解除
ServerName 192.168.33.14:443  # サーバのIPアドレスに変更
 
SSLCertificateFile /etc/pki/tetsis-server/server.crt
SSLCertificateKeyFile /etc/pki/tetsis-server/server.key
SSLCACertificateFile /etc/pki/tetsisCA/cacert.pem
SSLCARevocationFile /etc/pki/tetsisCA/crl.pem

Apacheの再起動

systemctl restart httpd

ブラウザにオレオレCA証明書(cacert.pem)を追加 (Google Chrome)

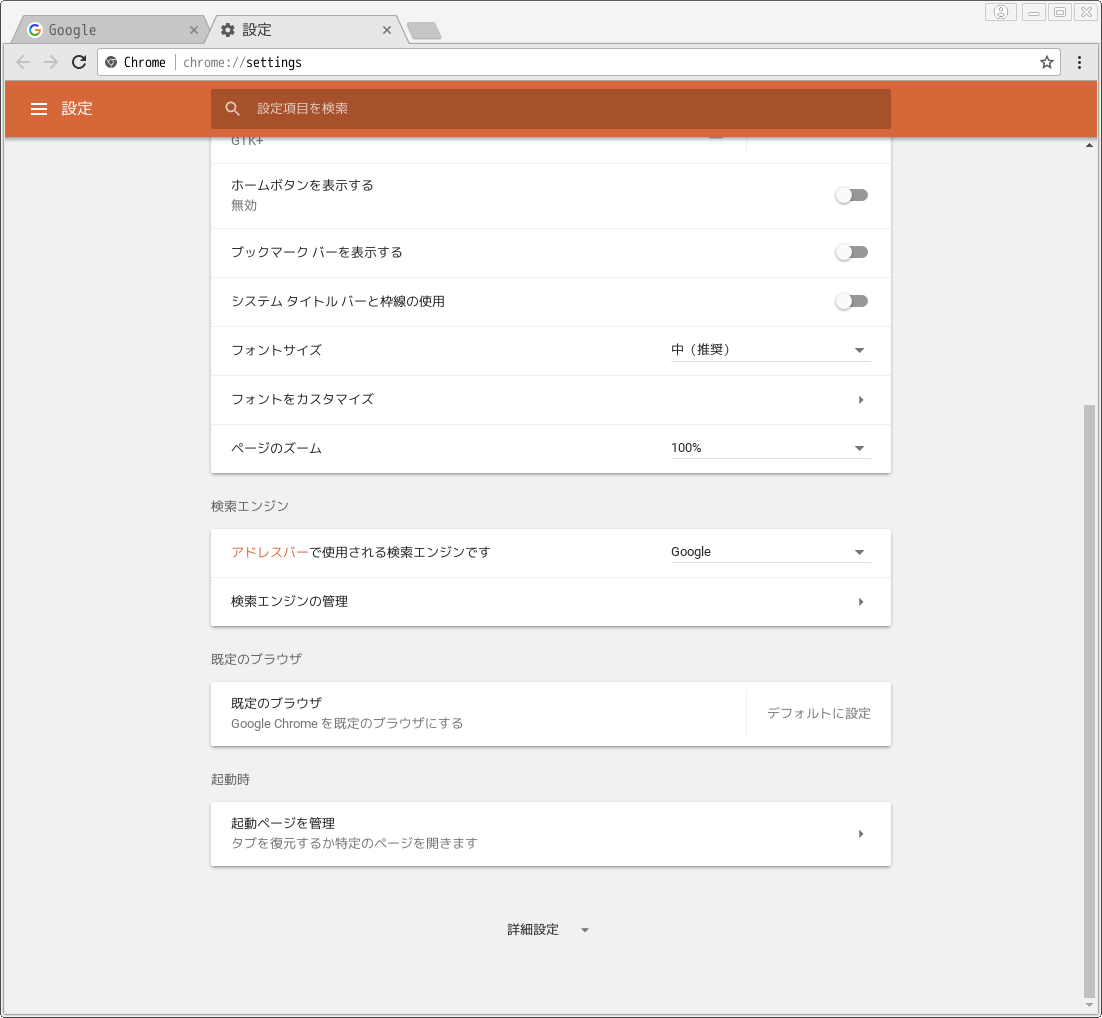
  • 「設定」画面の「詳細設定」をクリック
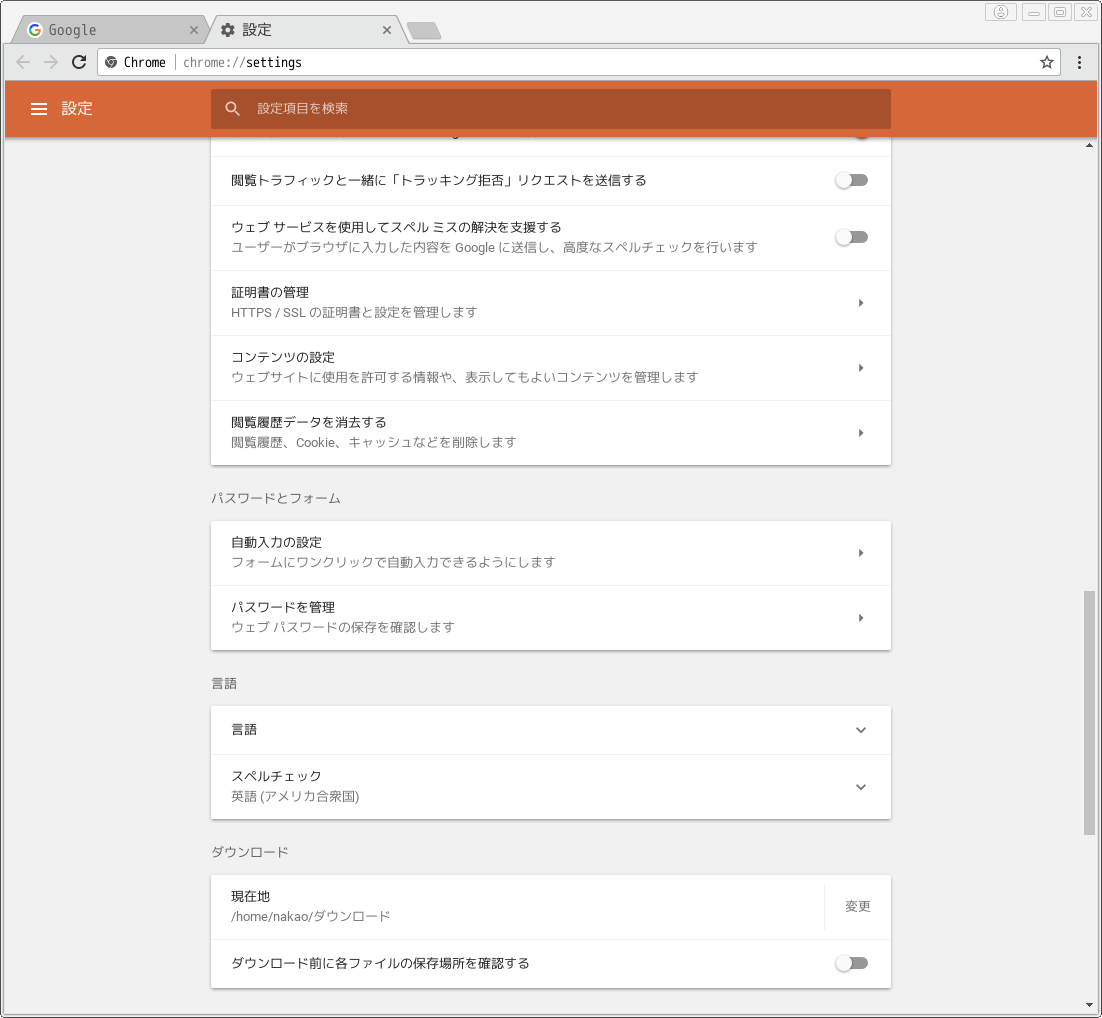
  • 「証明書の管理」をクリック
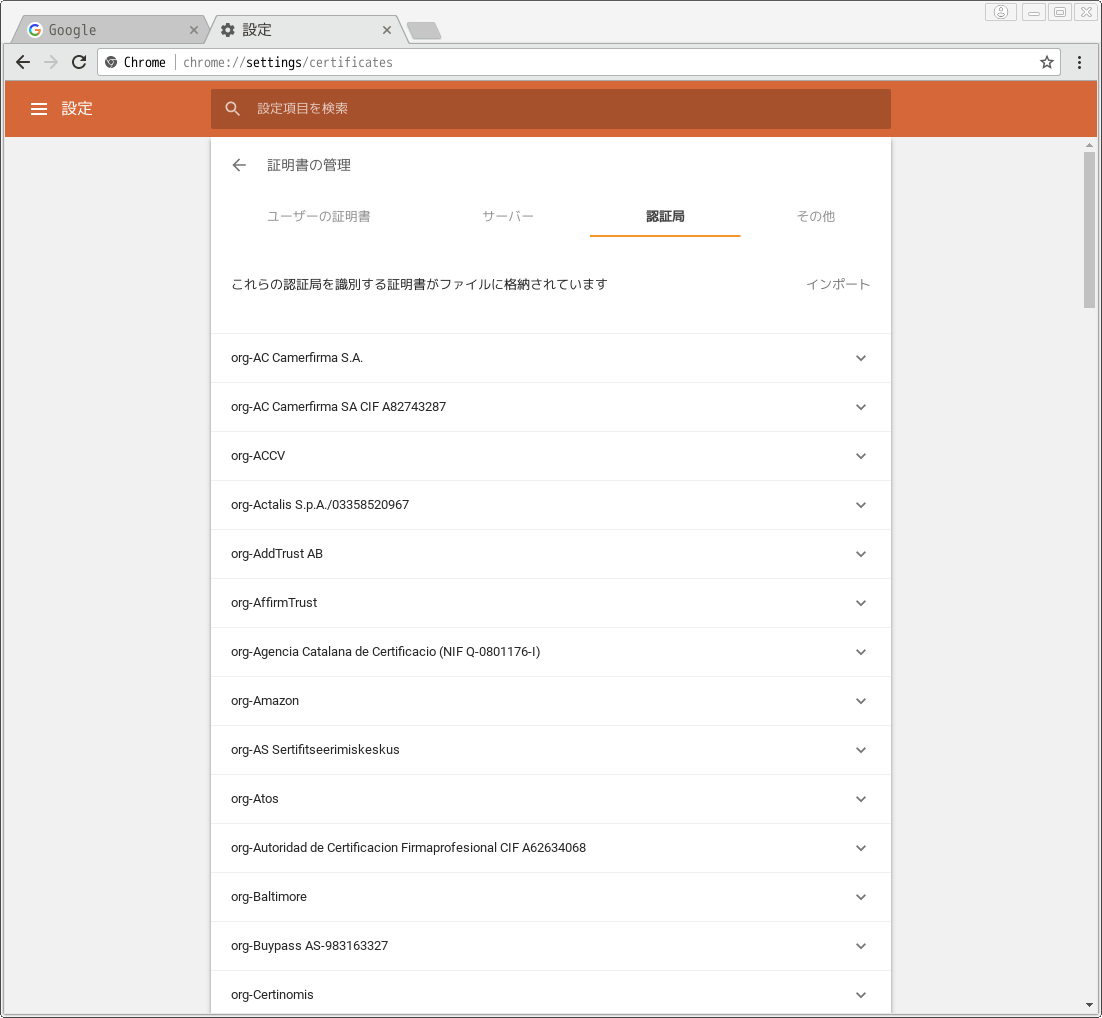
  • 「認証局」タブの「インポート」をクリック
  • 証明書ファイル(上記例通りならcacert.pem)を選択。「ウェブサイトの識別で…」をチェックし、「OK」をクリック
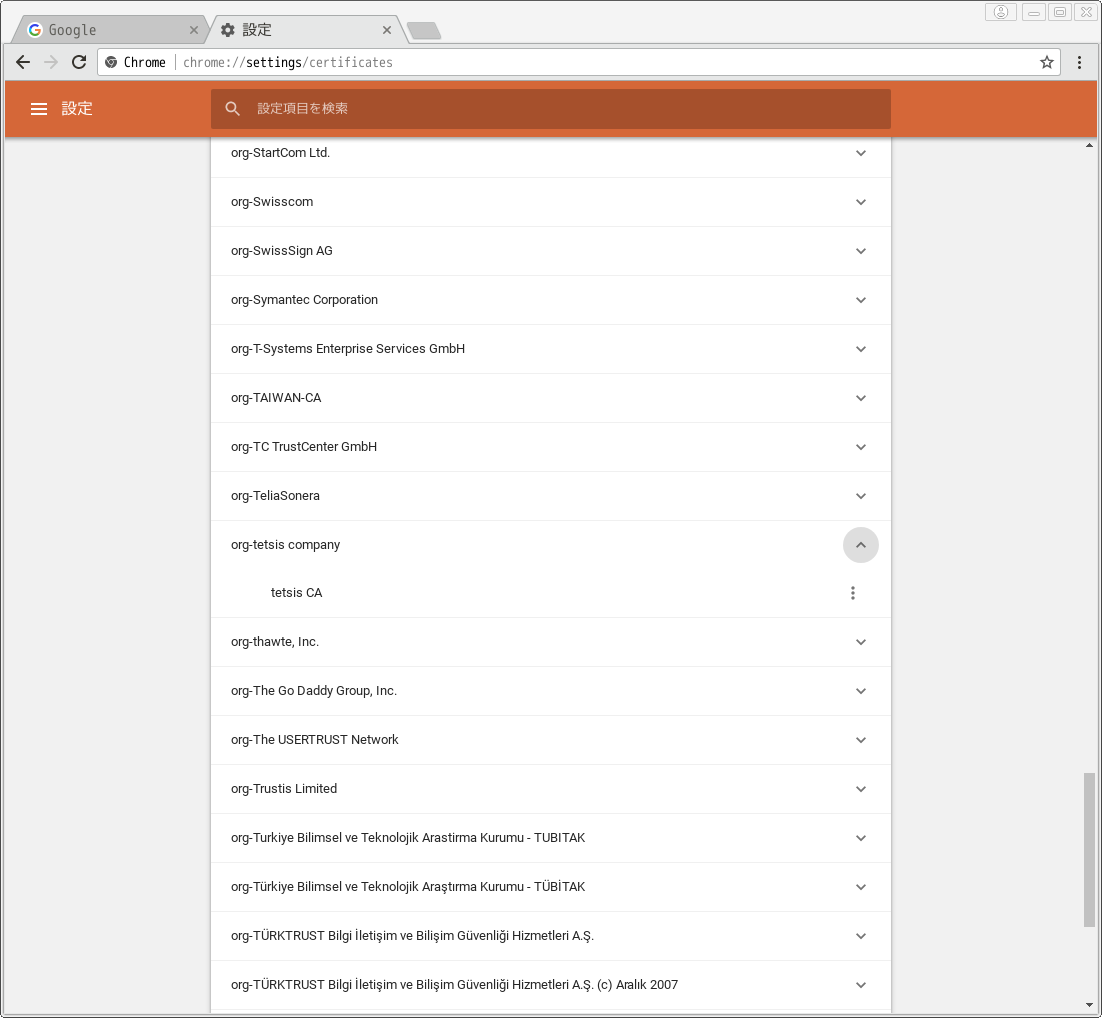
  • 「認証局」一覧に追加した認証局(例ではtetsis CA)が追加されている。

確認

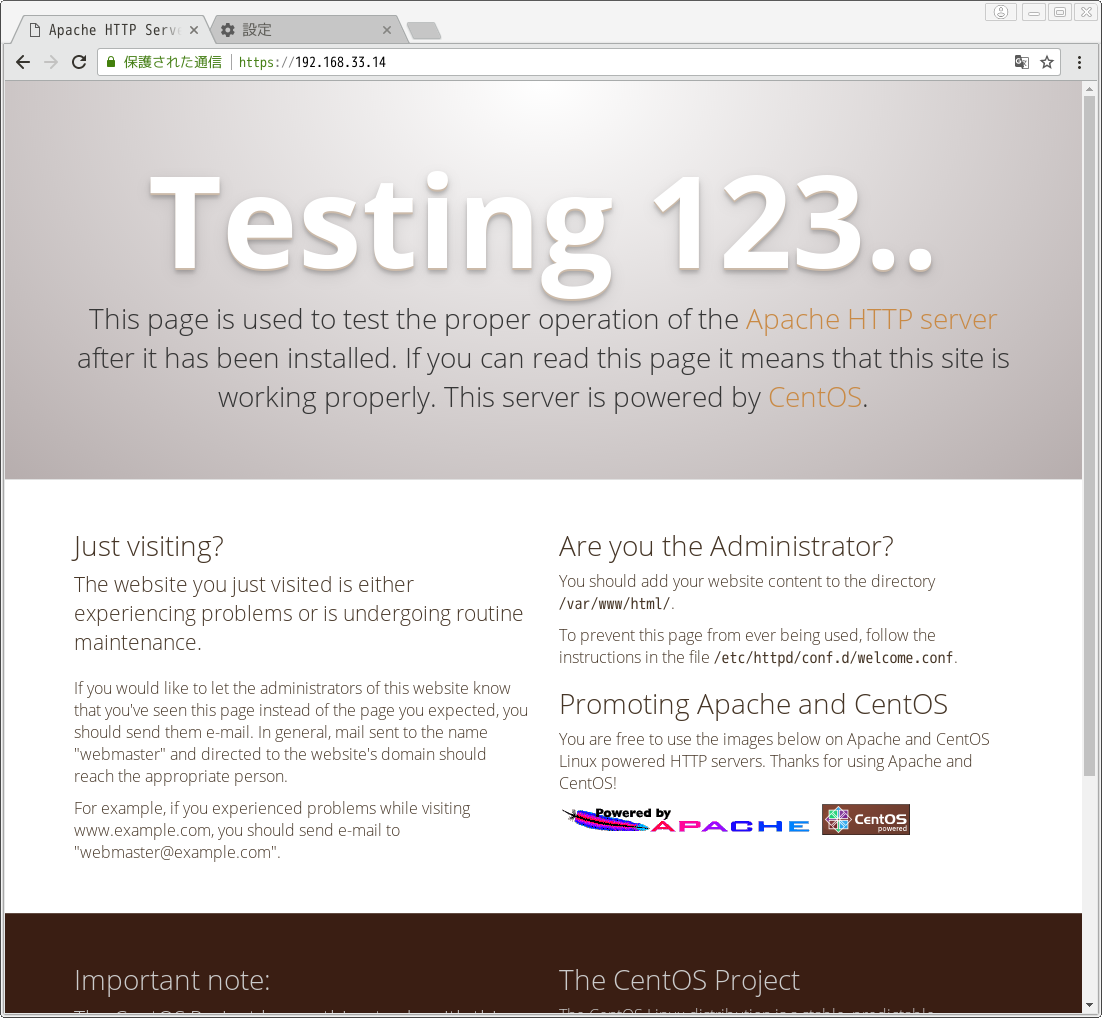
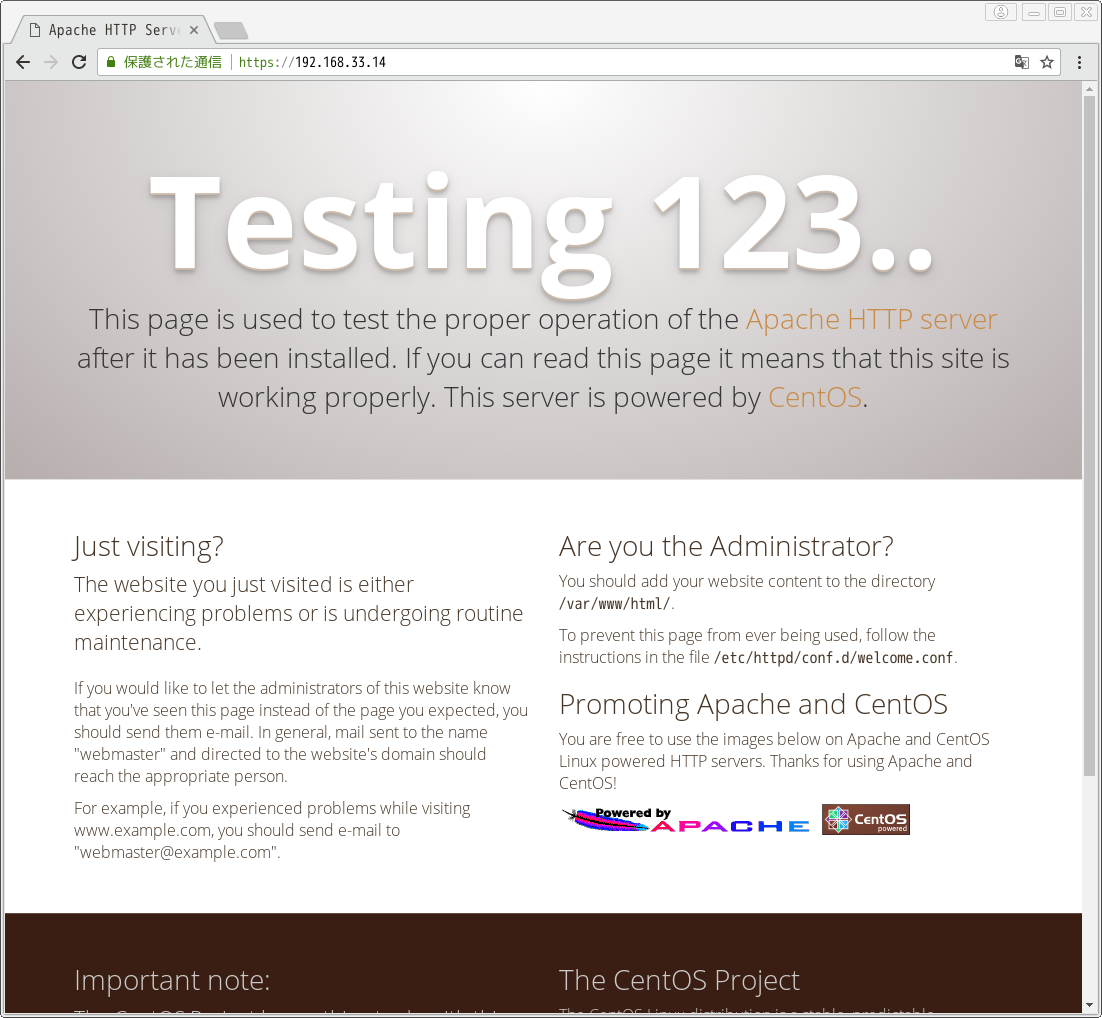
Chromeで「https://(IPアドレス(今回の例では192.168.33.14))」にアクセスするとそのままページが表示される。
ちゃんと「保護された通信」として認められてる。

参考サイト